Next: The excitation panel, Previous: Creating a geometry file with the wxGBTool, Up: Creating a geometry file with the wxGBTool
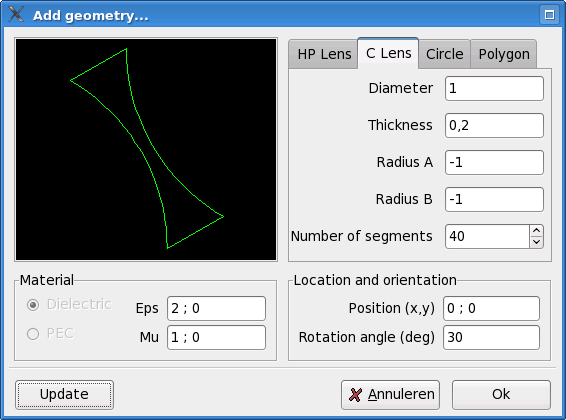
When the `add' button in the geometry section is pressed, the following pop-up screen appears.

All geometries are internally treated as a polygon. To make it easier for the user, wxGBTool has explicit support for three other types: Hyperbolic-plano lenses, circular lenses and circles. By selecting the corresponding tab the parameters associated with a certain type is geometry appear.
Note that everything is measured in meter (metric).
Note that the actual shape of the lens depends on both the focal distance parameter and the refractive index (epsilon and mu).
x ; y',
e.g. for a triangle, enter
                -1 ; -1
                 1 ; -1
                 0 ;  1
Any number of points can be added to list. Take into account however that the objects can not self-intersect and that the points need to traverse the contour in a counter clockwise fashion. The final point is automatically connected to the first, do not enter it twice. Also note that the edges of the polygon are automatically subdivided by the Nero2d solver.
In the lower left section you can chose between a PEC or dielectric
object and you enter the relative permittivity and permeability in the
same way coordinates are entered real ; imag. Note that for
lens objects, only a dielectrics are possible.
In the lower right section you can enter the position of the object and chose a rotation angle (in degrees).
Once a change is made, the object can be pre-viewed by pressing the `update' button. If the `Ok' button is pressed, the object is added to scene and is shown in the main window. Note that objects can be embedded into other dielectrics (to simulate for example coatings), however, objects can not touch each other of overlap.